
Server leasing companies are faced with the need to automate the installation of operating systems. In the early years, we at HOSTKEY only offered customers a limited range of installation options, but over time we have improved our service, and now we’ll tell you how you can do it affordably.
Disadvantages of Manual Installation
At first, our engineers installed systems on servers manually using DVD distribution copies and clunky USB drives which weighed about a kilogram each and required a separate power supply (they only much later began to draw power from the server's USB port).

We then replaced all optical drives with Zalman USB drives with a hard drive inside and the ability to select an ISO image from a tiny menu using a slider.

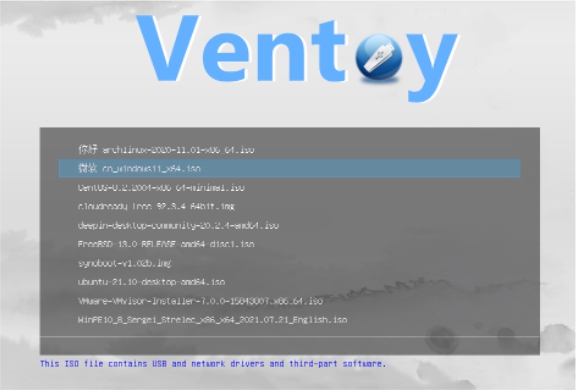
After that, we moved on to flash drives with the Ventoy autoloader. This was combined with IPMI and IP KVM, often requiring a monitor and keyboard. Even today, we still install these USB flash drives with an ISO library on client servers upon request.
Even with a relatively small number of machines, organizing this kind of work is possible, though the main problem with manual use is the absence of scaling options. If the server park is expanding, it is incumbent to hire more engineering staff and increase the rent. In addition, the market has shift; indeed it has become a faux pas not to offer self-service options.
Problems with automation…
To begin with, we deployed a PXE server: this solved the scaling issue for a while, but as we grew, new difficulties arose. The most critical one was the need to manage the installation of the OS for different models of motherboards. PXE simply didn't allow us to do this efficiently, so we were forced to seek out options to simplify automatic installation that did not require extraneous actions from our engineers or technical support specialists.
The way out of this predicament was the introduction of a regular Foreman to manage the PXE deployment procedure and OS configurations via an API interface. So, we acquired a more advanced automation system and made configurations for the main operating systems. But then new problems emerged:
- This deployment allowed us to manage Linux installations, but when installing Windows in UEFI mode, there were problems. When loading WIM or ISO images into ramdisk, iPXE did not work. We fixed this by deploying via our own CentOS Live CD, which started the process and prepared the server for the installation with Windows PE. The hardware side of this kind of deployment is a whole other story, so we will tell you about it another time. This experience laid the foundation for changing how we approached Linux installations.
- Just as the problem with Windows was generally resolved, Canonical removed support for Debian-Installer in Ubuntu 20.04. We had to create an unattended installation for Casper, which at that time was underdeveloped and rather cumbersome.
Solving problems as they come up turned out to be time-consuming and inefficient from a business standpoint, so we decided to use an integrated approach and compiled a list of requirements for the future system:
- No problems with support for various installers in the future.
- Simplified deployment support for Unix systems, since the configuration of Casper is radically different from Anaconda, and it is not even close to Debian-Installer, not to mention RouterOS from Mikrotik, OpenSUSE or some ArchLinux.
- The presence of a unified procedure for partitioning disks and setting volumes in order to manage it all in the future through our host Web API.
…and their solutions
Our experience with Windows Server helped us a lot. For automation, we use a LiveCD based on CentOS 8, which is done through Jenkins and stored on Git. We can control the composition of the software, support for the hardware, and also change the behavior of the image when loading through the Foreman API by setting trigger parameters. This allows you to start testing and formatting the server, collecting information about the components of the dedicated server, installing Windows and installing Unix systems. How this bed is laid is a story for a separate article.
When creating a Unix installation, we started from the fact that it does not require a complex installation procedure. It is enough to partition the disk, write the OS files to it and apply basic settings:
- - set hostname;
- - set up the mounting of file systems via fstab;
- - set up the network;
- - create a service user with a its own password and keys;
- - choose a few extra settings (set the location, etc.);
- - update the OS.
The whole procedure is very similar to installing ArchLinux following the classic Beginners Guide. The first launch of new installations has been planned for the main popular distributions, namely Debian, Ubuntu, and CentOS.
Stages of Automation
- Preparation of an image with files. This is a fairly simple procedure, for which you need to install the OS, and then reduce the size of the image: remove the kernel (via the package manager), clear the caches and reset the network configuration. Operations on the OS are performed via chroot on the mounted partition with the root file system, and then its contents are sent to the tar.gz archive. The subsequent update or addition of standard software is performed in the same way, but in the reverse order: unload the image from the mirror, add software, update, clear caches and pack it into an archive again. As a result, the image is ready and lies in wait on the mirror.
Preparation script for OS installation. Our script is assembled from several parts. Foreman uses a separate entity for partition table breakdowns that are bound to the OS type. In the future, we will move to a single partition format controlled from the API.
Since the new partitioning is a generic shell script for CentOS 8, we didn't need to bind individual disk partition tables to specific systems. Each table is a link to a universal script through a snippet and is formatted like this:
<%#
kind: ptable
name: Debian_LVM_HBA
oses:
- Debian
- Ubuntu
-%>
<%= snippet 'Linux_Default_part_HBA' %>
The real code is in the Linux_Default_part_HBA snippet and is not duplicated.
The script itself is written in shell and performs the following procedures:
- It analyzes the composition of block devices and selects the smallest one for installing the OS.
for device in ${blockdevices[*]};do
if [[ `cat /sys/block/$device/queue/rotational` -eq 1 ]];then
hdd_devs+=($device)
elif [[ $(cut -d: -f1 < /sys/block/$device/dev) -ne 8 ]];then
nvme_devs+=($device)
else
ssd_devs+=($device)
fi
done
# Simply set first device by type and size priority
if [[ ! -z $nvme_devs ]];then
INST_DRIVE=$( GET_SMALLEST_DRIVE ${nvme_devs[@]} )
fi
if [[ ! -z $ssd_devs ]]&&[[ -z $INST_DRIVE ]];then
INST_DRIVE=$( GET_SMALLEST_DRIVE ${ssd_devs[@]} )
fi
if [[ ! -z $fake_r ]]&&[[ -z $INST_DRIVE ]];then
INST_DRIVE=${fake_r[0]}
fi
if [[ ! -z $hdd_devs ]]&&[[ -z $INST_DRIVE ]];then
INST_DRIVE=$( GET_SMALLEST_DRIVE ${hdd_devs[@]} )
fi
<% end -%>
if [[ -z $INST_DRIVE ]];then
ERROR_REPORT partitioning
exit 1
fi
- It wipes the existing disks of traces of file system labels, LVM, etc.
- It performs partitioning using parted separately for installations in EFI or Legacy modes:
# Base partitioning
if [ -d /sys/firmware/efi ];then
if [[ $(echo $INST_DRIVE | grep -c nvme) -eq 0 ]];then
ESP_PART=${INST_DRIVE}1
BOOT_PART=${INST_DRIVE}2
ROOT_PART=${INST_DRIVE}3
else
ESP_PART=${INST_DRIVE}p1
BOOT_PART=${INST_DRIVE}p2
ROOT_PART=${INST_DRIVE}p3
fi
parted -s /dev/${INST_DRIVE} mklabel gpt mkpart fat32 1MiB 256MiB set 1 esp on
parted -s /dev/${INST_DRIVE} mkpart $FILESYSTEM 256MiB 1GiB
parted -s /dev/${INST_DRIVE} mkpart $FILESYSTEM 1GiB $ROOT_PART_SIZE
wipefs -a /dev/$ESP_PART
mkfs.vfat -F32 /dev/$ESP_PART
else
if [[ $(echo $INST_DRIVE | grep -c nvme) -eq 0 ]];then
BOOT_PART=${INST_DRIVE}1
ROOT_PART=${INST_DRIVE}2
else
BOOT_PART=${INST_DRIVE}p1
ROOT_PART=${INST_DRIVE}p2
fi
parted -s /dev/${INST_DRIVE} mklabel msdos
parted -s /dev/${INST_DRIVE} mkpart primary $FILESYSTEM 1MiB 1GiB set 1 boot on
parted -s /dev/${INST_DRIVE} mkpart primary $FILESYSTEM 1GiB $ROOT_PART_SIZE
fi
The examples above assume a partitioning without RAID. If you need to create auto-layout for more complex block configurations, separate scripts are used, and we choose exactly what the OS is installed with via the Foreman API. In the future, we plan to shift to a more complex system with flexible staking management through our own API and a user-friendly interface in the user control panel.
The result of all this work on the disk is a mounted structure with a root for a new installation. There is always only one Mountpoint (/mnt), and what kind of file systems it contains does not matter for the following blocks of the script. Thus, this is an error control point during installation.
The subsequent steps of the installation are performed by the main Linux_Default script, which includes a script for partitioning disks. It handles common tasks for installing every type of OS:
<%#
kind: provision
name: Linux_Default
model: ProvisioningTemplate
-%>
#!/usr/bin/env bash
STAGE_CALL provisioning_start 5
# Set param manualprovision on OS for starting script manualy
<% if host_param_true?('manualprovision') %>
sleep 5
echo "=============================="
echo -e "\n You can start /provision.sh manualy \n"
echo "=============================="
exit 0
<% end -%>
# Set param manualprovision on OS for starting script manually
<% if host_param('medium_fqdn') == "mirror.hostkey.com" -%>
TZ="Europe/Amsterdam"
NTP_SRV="ntpserver.example.com"
<% elsif host_param('medium_fqdn') == "mirror.hostkey.us" -%>
TZ="America/New_York"
NTP_SRV="ntpserver.example.us"
<% else -%>
TZ="Europe/Moscow"
NTP_SRV="ntpserver.example.ru"
<% end -%>
# Here we insert the layout
<%= @host.diskLayout %>
# We download the OS template from the mirror and unpack it to the root of the new OS
cd /mnt
curl -k -L --output - -s <%= @host.os.medium_uri(@host) %>/<%= @host.operatingsystem.name %>.tar.gz | tar xvz
# We connect virtual file systems to a new root
mount --bind /dev /mnt/dev
mount --bind /dev/pts /mnt/dev/pts
mount --bind /sys /mnt/sys
mount --bind /proc /mnt/proc
mount --bind /run /mnt/run
<% if host_param_true?('uefi') %>
mkdir /mnt/boot/efi
mount /dev/$ESP_PART /mnt/boot/efi
<% end -%>
STAGE_CALL provisioning_end 5
# We can prompt OS-specific tasks
<%= snippet_if_exists(template_name + "_" + @host.operatingsystem.family) %>
# additional non-specific tasks performed with an unpacked root, such as generating fstab, a hostname, setting the root password, etc.
STAGE_CALL finish_template_start 5
# We will unmount the root
<% if host_param_true?('uefi') %>
umount /dev/$ESP_PART
<% end -%>
umount /mnt/dev/pts
umount /mnt/*
umount /mnt
swapoff /dev/$VGNAME/swap
# We will send your Foreman a message about the completion of the installation
wget --no-proxy --quiet --output-document=/dev/null <%= foreman_url('built') %>
sync
STAGE_CALL finish_template_end 5
reboot
Here you can also set the hostname, generate fstab (the genfstab script from the ArchLinux LiveCD helped us a lot with this), set the user, location, etc. In general, follow the procedures that are the same for any modern Linux distributions.
Specific mandatory tasks are network setup, as well as OS upgrades and software installations. Since network configuration is tied to the adapter names and other specific parameters, we use the firstinstall script. It is generated at the installation stage and is written by the main script to the OS file system. The script starts with systemd or rc, depending on the OS.
I will provide an example network configuration for Ubuntu/Debian:
# Setting network up
CONNECTION_NAME=\$(ip l | grep -B1 -i '<%= @host.mac %>' | head -1 | cut -d: -f2)
<% if @host.operatingsystem.name.include?('debian') or @host.operatingsystem.name.include?('ubuntu_bionic') %>
cat << EON > /etc/network/interfaces
#loopback
auto lo
iface lo inet loopback
#
auto \$CONNECTION_NAME
allow-hotplug \$CONNECTION_NAME
iface \$CONNECTION_NAME inet static
address <%= @host.ip %>
gateway <%= @host.subnet.gateway %>
netmask <%= @host.subnet.mask %>
dns-nameservers <%= @host.subnet.dns_primary %>
dns-search <%= @host.domain %>
EON
ifdown \$CONNECTION_NAME
ifup \$CONNECTION_NAME
<% else %>
mkdir -p /etc/netplan
cat << EON > /etc/netplan/01-netcfg.yaml
# This file describes the network interfaces available on your system
# For more information, see netplan(5).
network:
version: 2
renderer: networkd
ethernets:
\$CONNECTION_NAME:
addresses: [ <%= @host.ip %>/<%= @host.subnet.cidr %> ]
gateway4: <%= @host.subnet.gateway %>
nameservers:
search: [ <%= @host.domain %> ]
addresses:
- "<%= @host.subnet.dns_primary %>"
EON
netplan apply
<% end -%>
The escaping $ is used here because the firstinstall script is included in the body of the main script. It is inserted into the root file of the OS via “cat <EOF>”.
So that we can see the progress of our installation, each stage of the process is controlled by STAGE_CALL calls to our API, and if something goes wrong, it is reflected in the logs. The installation is a single script that is easy to debug: just set the manualinstall parameter in Foreman to get a LiveCD with a compiled script, but without starting the installation.
The main disadvantage of this approach is that since the installation is carried out on a separate OS, it is impossible to identify problems with hardware compatibility until the reboot stage. On the other hand, adding support for new hardware is even easier as there is no need to support udeb for Debian/Ubuntu, for example.
Conclusion
By switching to a new scheme, we have unified the process of deploying an OS and servicing servers of different generations: systems without UEFI (based on 1366 sockets and the like), HP and IBM blade systems, Supermicro servers from generations X8 to X12, Gigabyte, Asus and Asrock, custom BIOS for T-platforms and OCP Winterfell, as well as modern Dell servers and motherboards for EPYC and Ryzen on which Legacy mode is not actually supported.
Now we have automated the renting out of almost 90% of our machines to our customers: if you order a standard or stock server through the API or the website, it will be completely ready within 5-15 minutes. The solution described in this article has made it possible to almost completely automate the independent reinstallation of the OS by the client through their personal account or API. Our engineers, only in rare cases, need to connect to those machines deployed without remote control, those with non-standard variations, and also in the event of a complex configuration of the disk subsystem.
Now the release of a new branch of the OS and the next installation system will not make you contemplate changing careers - it will rather be a routine event that happens once a quarter. We will continue to work on improving our deployment system every day, analyzing the logs of unsuccessful installations, as well as testing new motherboards and server platforms in various modes. We are adding new features for partitioning disks, transferring SSH keys, setting the OS and network addresses, notifying clients about installations, and more. The system is completely ready for development and expansion.